


This article outlines the necessary steps to turn a Blazor Web Assembly App to be a Progressive Web Application, or PWA.
PWA is a type of web application with the capabilities to provide a user experience similar to that of mobile apps. Among these capabilities is the ability to work offline or with limited connectivity. This can help minimize the downtime for the services that your web site offers, many of which can be done offline.
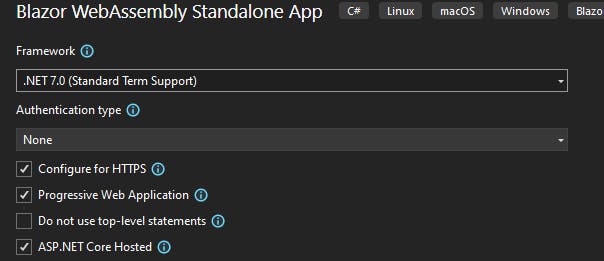
The migration steps are based on the study over the Blazor Web Assembly Templates provided by Microsoft which offers the PWA:
From the available target frameworks offered by these templates, it can be likely that PWA seems to be only applicable, or at least confirmed mostly functional, for .NET 7.0 and above. However, there is still a chance PWA can still work for .NET 6.0.
Step 1: Test
First, test your web application whether it is not PWA or already PWA. Access your web application, including the test or staging version if you have one.
Verify that at first, your web application should be online.
Open DevTool of your browser, usually by pressing F12 for Chrome and Edge. The examples below are based on Chrome and Edge:
Find and click on the tab Network of the DevTool. You should find a dropdown list on top of the window where default value is "No throttling" (or a different value such as "Fast 3G", "Slow 3G", "Offline", etc., depending on whether there is someone else testing on your browser earlier).

Change the value to "Offline"

Refresh your web application page. If your web application page lost connection, i.e. it is not PWA yet (or the PWA may not be in place):

Otherwise, if your web application is still accessible, i.e. certain form of PWA is already in place. At this point, possibly test whether functions that is expected to be offline is still working. Consult with your web application team whether there is any need to improve the existing PWA.
Now move to the next step if the web application is not PWA (or the PWA may not be effective yet).
Step 2: Add necessary files for PWA
Add the following 3 files into the wwwroot folder of the Blazor Web Assembly project:
service-worker.js
// In development, always fetch from the network and do not enable offline support.
// This is because caching would make development more difficult (changes would not
// be reflected on the first load after each change).
self.addEventListener('fetch', () => { });
service-worker.published.js
Note: The content below is based on the Web Assembly Empty version for .NET 7.0, which is tested working with .NET 8.0. However, it is found that template for .NET 8.0 has this script slightly different. If you would like to use that version (or any updated version from future template), consider creating a new Web Assembly project temporarily with the PWA checked and referring the service-worker.published.js offered by that template.
// Caution! Be sure you understand the caveats before publishing an application with
// offline support. See https://aka.ms/blazor-offline-considerations

self.importScripts('./service-worker-assets.js');
self.addEventListener('install', event => event.waitUntil(onInstall(event)));
self.addEventListener('activate', event => event.waitUntil(onActivate(event)));
self.addEventListener('fetch', event => event.respondWith(onFetch(event)));

const cacheNamePrefix = 'offline-cache-';
const cacheName = `${cacheNamePrefix}${self.assetsManifest.version}`;
const offlineAssetsInclude = [/\.dll$/, /\.pdb$/, /\.wasm/, /\.html/, /\.js$/, /\.json$/, /\.css$/, /\.woff$/, /\.png$/, /\.jpe?g$/, /\.gif$/, /\.ico$/, /\.blat$/, /\.dat$/];
const offlineAssetsExclude = [/^service-worker\.js$/];

async function onInstall(event) {
    console.info('Service worker: Install');

    // Fetch and cache all matching items from the assets manifest
    const assetsRequests = self.assetsManifest.assets
        .filter(asset => offlineAssetsInclude.some(pattern => pattern.test(asset.url)))
        .filter(asset => !offlineAssetsExclude.some(pattern => pattern.test(asset.url)))
        .map(asset => new Request(asset.url, { integrity: asset.hash, cache: 'no-cache' }));
    await caches.open(cacheName).then(cache => cache.addAll(assetsRequests));
}

async function onActivate(event) {
    console.info('Service worker: Activate');

    // Delete unused caches
    const cacheKeys = await caches.keys();
    await Promise.all(cacheKeys
        .filter(key => key.startsWith(cacheNamePrefix) && key !== cacheName)
        .map(key => caches.delete(key)));
}

async function onFetch(event) {
    let cachedResponse = null;
    if (event.request.method === 'GET') {
        // For all navigation requests, try to serve index.html from cache
        const shouldServeIndexHtml = event.request.mode === 'navigate';

        const request = shouldServeIndexHtml ? 'index.html' : event.request;
        const cache = await caches.open(cacheName);
        cachedResponse = await cache.match(request);
    }

    return cachedResponse || fetch(event.request);
}
manifest.json
Feel free to amend the values to match with your web application:
{
  "name": "Your web application name",
  "short_name": "Your web application short name",
  "start_url": "./",
  "display": "standalone",
  "background_color": "#ffffff",
  "theme_color": "#03173d",
  "prefer_related_applications": false,
  "icons": [
    {
      "src": "favicon.ico",
      "type": "image/x-icon",
      "sizes": "48x48"
    }
  ]
}
Step 3: Altering the application codes
.csproj
Edit the YourProject.csproj file, to add the following line as a content for tag <PropertyGroup>:
<ServiceWorkerAssetsManifest>service-worker-assets.js</ServiceWorkerAssetsManifest>
Then add the following <ItemGroup> for the root tag <Project>:
<ItemGroup>
    <ServiceWorker Include="wwwroot\service-worker.js" PublishedContent="wwwroot\service-worker.published.js" />
</ItemGroup>
The end result of YourProject.csproj should look like this:
<Project Sdk="Microsoft.NET.Sdk.BlazorWebAssembly">

    <PropertyGroup>
        <TargetFramework>net8.0</TargetFramework>
        <Nullable>enable</Nullable>
        <ImplicitUsings>enable</ImplicitUsings>
        <ServiceWorkerAssetsManifest>service-worker-assets.js</ServiceWorkerAssetsManifest>
    </PropertyGroup>

    ...

    <ItemGroup>
        <ServiceWorker Include="wwwroot\service-worker.js" PublishedContent="wwwroot\service-worker.published.js" />
    </ItemGroup>

</Project>
index.html
Edit your wwwroot\index.html with the following:
Add the following line as the content for the tag <head>:
<link href="manifest.json" rel="manifest" />
Add the following line as the content for the tag <body>:
<script>navigator.serviceWorker.register('service-worker.js');</script>
The end result of wwwroot\index.html should look like this:
<!DOCTYPE html>
<html>

<head>
    ...
    <link href="manifest.json" rel="manifest" />
</head>

<body>
    ...
    <div id="blazor-error-ui">
        An unhandled error has occurred.
        <a href="" class="reload">Reload</a>
        <a class="dismiss">🗙</a>
    </div>
    <script src="_framework/blazor.webassembly.js"></script>
    <script src="_content/MudBlazor/MudBlazor.min.js"></script>
    <script>navigator.serviceWorker.register('service-worker.js');</script>
</body>

</html>
Step 4: Test Local, Deploy, and Verify
If possible, test your change in the project locally, if possible. Verify the change still make your web application functional. You may not be able to test offline state locally.
Deploy the changes to your test or staging environment, if you have one. Otherwise, deploy to your live web application.
Repeat the test steps in Step 1. Access your app with Online connectivity first to acquire the new updated app into your device, then access with Offline connectivity.
If done correctly, your web application should be accessible during Offline connectivity, given that your browser has accessed the live web application before.